Articles > Nappy Changing Techniques
The Next Heading section in the topics of diapering and hygiene is of utmost importance as it provides a comprehensive overview of the key concepts and aspects that will be covered in this section. This section serves as a guide for parents, caregivers, and anyone involved in the care of infants and young children to ensure proper cleanliness, hygiene practices, maintaining comfort, and promoting their health and well-being.
Within this section, various diapering techniques will be discussed, focusing on the best practices for diaper changing and proper disposal of used diapers. The importance of maintaining cleanliness during diaper changes will be emphasized, including the significance of washing hands before and after the process. Effective hygiene practices, such as wiping the baby's bottom thoroughly and gently, will be highlighted to prevent rashes and infections.
Furthermore, this section will delve into the aspects of maintaining comfort for the baby. It will cover topics such as choosing the right diaper size, ensuring proper fit, and using diaper creams or powders when necessary. The section will also emphasize the importance of regular diaper changes, as prolonged wearing of wet or soiled diapers can cause discomfort and lead to potential skin issues.
Lastly, this section will underscore the vital role of proper diapering and hygiene practices in promoting the overall health and well-being of the baby. It will address the potential health risks associated with inadequate cleanliness, such as diaper dermatitis and urinary tract infections. By following the guidelines provided in this section, caregivers can minimize the risk of these health issues and create a clean and healthy environment for the baby.
In conclusion, the Next Heading section is crucial in the topics of diapering and hygiene as it provides a comprehensive understanding of the key concepts and aspects to be covered. By following the recommended diapering techniques, maintaining proper cleanliness, and promoting hygiene practices, caregivers can ensure the comfort, health, and well-being of infants and young children.
Introduction:
Hygienic nappy changing plays a crucial role in ensuring the health and comfort of a baby. It involves the process of regularly cleaning and changing a baby's diaper to maintain hygiene and prevent various health issues. Maintaining proper hygiene during nappy changing is essential to prevent infections, irritations, and diaper rash. It also helps in promoting the baby's overall comfort, as a clean and fresh diaper can contribute to a sense of well-being and prevent unnecessary discomfort or distress. Proper nappy changing not only supports the physical health of the baby but also aids in establishing a routine and nurturing a healthy caregiver-child bond. In this article, we will delve into the significance of hygienic nappy changing and explore some essential tips to ensure optimal health and comfort for the baby.
To gather the necessary supplies for the next heading, follow these steps:
1. Review the Background Information: Before gathering supplies, it is important to understand the specific types of supplies needed. Refer to the provided Background Information to identify the supplies required for the upcoming task.
2. Make a List: Create a comprehensive list of the supplies mentioned in the Background Information. Include any specific brands or sizes if specified. This will ensure that no essential supplies are missed during the gathering process.
3. Research and Source: Conduct thorough research to find suitable places to procure the required supplies. This may involve searching online, visiting local stores, or contacting specific suppliers. Consider factors such as availability, pricing, and quality when selecting the sources.
4. Purchase or Gather: Once the sources are identified, proceed to acquire the supplies. Purchase them from the selected stores or suppliers, or gather them if they are already available in your possession. It is essential to ensure that the supplies meet the required specifications mentioned in the Background Information.
5. Organize and Prepare: After gathering the supplies, organize them according to the upcoming task's requirements. This will allow for easy access and efficient workflow during the execution of the task.
By following these necessary steps and paying attention to the types of supplies mentioned in the Background Information, you can successfully gather all the required materials for the next heading.
When it comes to changing a baby's diaper, having the right supplies on hand is crucial to ensure both the baby's comfort and cleanliness. A well-stocked diaper changing station should include essentials such as clean nappies, baby wipes, diaper cream, and a changing mat. These supplies not only provide convenience but also help maintain proper hygiene and prevent rashes or irritations. With the necessary items readily available, parents can confidently tackle diaper changes knowing they have everything they need to keep their little one fresh and dry.
Preparing the changing area is essential for a safe and hygienic diaper change. Follow these steps to ensure a positive and organized environment for both the caregiver and the child.
First, gather all the necessary supplies and make sure they are within reach. This includes clean diapers, wipes, diaper rash cream, and a change of clothes. Having them nearby will prevent you from leaving the child unattended during the process.
Next, organize the changing area by setting up a clean and comfortable space. Lay a changing mat or towel on a designated surface, ensuring it is free from any dirt or germs. Place the child's personal nappy changing tray beside the changing mat for easy access to essential items.
Before starting the diaper change, clean the change table if it has been previously used. Wipe it down with a disinfectant wipe or spray and let it dry. This will help maintain cleanliness and prevent the spread of bacteria.
Throughout the day, remember to regularly clean the change table thoroughly. Use a mild detergent and warm water to wipe the surface, removing any leftover residue or dirt. Doing a midday and end-of-day cleaning routine will ensure a clean and safe environment for every diaper change.
In terms of storage, keep the child's personal nappy changing tray stocked with an adequate supply of diapers, wipes, and rash cream. Additionally, make it a habit to regularly change the nursery cover for the changing mat to maintain hygiene.
Ensure safety by keeping plastic bags accessible to adults but securely out of reach for children. This prevents any hazardous situations while also allowing for easy disposal of soiled diapers.
Finally, always remember to keep one hand on the child during the diaper change to prevent accidents and promote a secure environment.
By following these steps, you can create a well-prepared, clean, and safe changing area for your child's diaper changes.
Cleaning and disinfecting the diapering surface is essential to maintain a hygienic and safe environment for the baby. To ensure proper cleaning, follow these necessary steps:
1. Determine the type of diapering surface: Firstly, identify whether the surface is waterproof or a fabric cover. Different cleaning methods are recommended for each type.
2. Waterproof surface: To clean a waterproof surface, such as a changing pad, start by wiping away any visible debris or dirt with a damp cloth or baby wipes. Then, apply a mild soap or detergent solution and gently scrub the surface using a soft brush or cloth. Rinse off the soap residue with water and pat dry with a clean towel.
3. Fabric cover: For fabric covers, start by removing the cover from the changing pad or table as per manufacturer instructions. If it is machine washable, follow the label's directions and wash it in hot water using a baby-safe detergent. If it is not machine washable, spot clean any stains or spills using a mild soap or detergent solution, and rinse thoroughly. Allow the fabric cover to air dry.
4. Disinfecting: After cleaning the surface, it is crucial to disinfect it to eliminate any germs or bacteria. Utilize a disinfectant spray or pre-moistened disinfectant wipes specifically designed for baby care products. Apply the disinfectant according to the product's instructions, ensuring thorough coverage. Allow the surface to air dry completely before laying down the baby.
By following these steps, you can effectively clean and disinfect the diapering surface, providing a germ-free and safe environment for your little one. Remember, regular cleaning and disinfecting are essential to maintain proper hygiene and protect your baby's health.
Introduction:
When it comes to taking care of a baby, it is of utmost importance to ensure their safety at all times. This includes being prepared with all the necessary supplies before attending to the baby's needs. By ensuring that all supplies are within reach, parents and caregivers can eliminate the risk of leaving the baby unattended. In this article, we will explore the significance of keeping supplies nearby and discuss some essential items that should be readily available for quick and efficient care of the baby. Remember, the key to ensuring the baby's safety and well-being is to be prepared and organized in handling their needs.
To lay down the baby for a diaper change, follow these simple steps. Start by finding a clean and safe surface, such as a changing table or a padded mat. Ensure that the surface is free of any objects that could potentially harm the baby.
Gently pick up the baby, cradling their head and neck with one arm, and supporting their body with your other arm. Slowly and carefully lower them onto the clean surface, making sure their head and body are properly supported throughout the process.
When laying down the baby, it's crucial to remember not to cover their belly button, especially if they are a newborn. A covered belly button may cause irritation or hinder the healing process, so be mindful not to place anything over this area.
Once the baby is safely and comfortably laid down, you can proceed with the diaper change. Make sure you have everything you need within reach, including clean diapers, wipes, and any other necessary items.
In conclusion, to begin the diaper change, gently lay down the baby onto a clean and safe surface while ensuring their head and body are properly supported. Remember not to cover the newborn's belly button. With these guidelines in mind, you can safely and effectively change the baby's diaper.
To gently place the baby on their back on the diapering surface, it is essential to prioritize their comfort and safety. Before starting, ensure that the diapering surface is appropriate and suitable for the baby's needs. Begin by checking if the surface is waterproof or if it has a fabric cover.
If the surface is waterproof, carefully examine for any visible soil or mess. If you notice any, it is crucial to wipe it up gently using a clean cloth or baby wipe. Once the visible soil has been removed, it is necessary to sanitize the surface by scrubbing it with a disinfectant spray or wipe. This will help eliminate any harmful bacteria or germs, promoting a clean and safe area for the baby.
If the diapering surface has a fabric cover, it is important to replace the soiled cover with a fresh one. This will ensure the optimal hygiene standards for the baby. Once the fresh cover is securely in place, gently lay the baby down on their back, making sure to support their head and neck. This position provides maximum comfort and convenience for both the baby and the caregiver during the diaper change process.
Remember to handle the baby with care and attention throughout the entire process, ensuring their safety and well-being. By following these steps, you can effectively and gently place the baby on their back on the diapering surface, minimizing any discomfort or risk of harm.
Introduction:
When facing difficult or stressful situations, finding ways to keep calm and composed can be immensely beneficial. Whether it's for oneself or for others, using soothing words or even singing a song can help create a calming atmosphere. By focusing on gentle tones, positive affirmations, and embracing the power of music, individuals can find solace amidst chaos and foster a sense of tranquility during the process. In the following headings, we will explore the effectiveness of using soothing words or singing a song to create a calm environment, and how these simple techniques can bring comfort and peace to those involved.
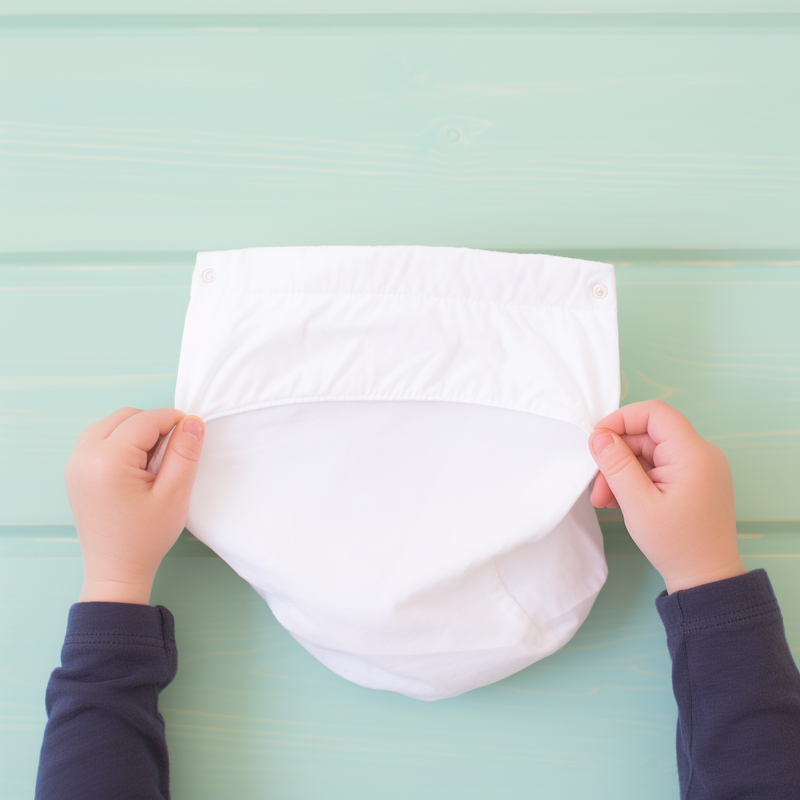
Removing a dirty nappy involves a few simple steps, but the actions may vary depending on whether the child is using cloth or disposable diapers. Here are the necessary actions for each scenario:
For disposable diapers:
1. Gather all the necessary supplies: a clean diaper, baby wipes, and a diaper rash cream (if needed).
2. Lay the child down on a safe and comfortable changing surface.
3. Unfasten the dirty diaper, being careful not to let any messes escape.
4. Fold the dirty diaper closed and set it aside for disposal.
5. Use baby wipes to gently clean the child's bottom, wiping from front to back.
6. If necessary, apply a small amount of diaper rash cream to protect the baby's skin.
7. Slide a clean diaper under the child's bottom, ensuring the tabs are at the front.
8. Fasten the clean diaper securely, making sure it is snug but not too tight.
9. Dispose of the used wipes and dirty diaper in a trash can or diaper pail.
For cloth diapers:
1. Follow steps 1-2 from above.
2. Unfasten the dirty cloth diaper and remove any solid waste by shaking it off into the toilet.
3. Place the dirty cloth diaper in a waterproof bag or storage container until it can be washed.
4. Use baby wipes to gently clean the child's bottom, following the same front-to-back wiping motion.
5. Follow steps 6-8 from above.
6. After removing the dirty cloth diaper, flush any solid waste in the toilet.
7. Follow the manufacturer's washing instructions for the cloth diapers. This usually involves a pre-rinse, a hot wash with detergent, and an additional rinse cycle.
8. Hang or tumble dry the cloth diapers according to the specific washing instructions.
By following these steps, you can effectively remove a dirty nappy while maintaining cleanliness and hygiene for your child.
Introduction: Proper disposal of disposable nappies or preparation of reusable nappies for washing is crucial in ensuring hygienic and environmentally sustainable practices. In this article, we will explore the importance of disposing of disposable nappies in designated bins and highlight the steps involved in preparing reusable nappies for washing. By following these guidelines, individuals can contribute to waste reduction efforts and promote a more sustainable approach to childcare.
Cleaning your baby's bottom and putting on a clean nappy is an essential part of the daily routine for caregivers. This process ensures the baby's hygiene and comfort throughout the day. Here is a step-by-step guide on how to properly clean your baby's bottom and put on a fresh nappy.
First, gather all the necessary supplies, including wipes or a damp washcloth, nappy cream (if needed), and a clean nappy. Place them within easy reach to avoid leaving your baby unattended.
Lay your baby on a secure and clean surface, such as a changing mat or a towel. Gently lift their bottom, being mindful of their delicate skin. Lay a clean nappy or cloth underneath to catch any mess.
Next, use wipes or a damp washcloth to clean your baby's bottom thoroughly. Start from the front and wipe towards the back to prevent any bacteria from spreading towards sensitive areas. Carefully clean all creases and folds, ensuring there are no traces of dirt or moisture.
If your baby has any rashes or irritation, apply a thin layer of nappy cream to protect and soothe their skin. Be sure to follow the manufacturer's instructions for the specific cream you are using.
After cleaning and applying nappy cream (if needed), it's time to fit the cloth or disposable nappy. Follow the manufacturer's instructions to ensure a proper fit and maximum leak protection. Adjust the fasteners or closures securely but avoid making them too tight, allowing room for your baby's comfort and movement.
Finally, discard any soiled materials hygienically and wash your hands thoroughly. Remember, front-to-back wiping, using appropriate cleaning products, and proper nappy fitting are crucial for maintaining your baby's hygiene and protecting their delicate skin.
By following these steps with care, you can ensure your baby's hygiene and comfort during nappy changes throughout the day.
Introduction:
When providing instructions or information, it is essential to strike a balance between being thorough and considerate towards the recipient's emotions. Effectively communicating without causing irritation or discomfort requires a deliberate approach that takes into account the recipient's perspective. By employing a gentle tone, ensuring clarity, and being mindful of the recipient's emotions, instructions can be communicated comprehensively and compassionately. In the following headings, we will explore specific strategies to achieve this delicate balance while delivering thorough and helpful instructions.
Applying diaper cream is an essential step in maintaining your baby's comfort and hygiene. Diaper cream forms a protective barrier between your baby's skin and the moisture and irritants in their diaper, preventing diaper rash and soothing any existing redness or irritation. Here, we will introduce the process of applying diaper cream, explain its importance, and highlight the appropriate time to use it.
To apply diaper cream, follow these simple steps:
1. Prepare: Gather your supplies, including a clean diaper, wipes, and diaper cream.
2. Clean and dry: Before applying diaper cream, make sure your baby's diaper area is clean and dry. Use mild wipes or warm water and a soft cloth to gently cleanse the area.
3. Apply cream: Take a small amount of diaper cream and dab it onto your clean fingertips. Gently spread the cream over your baby's entire diaper area, paying extra attention to any red or irritated areas.
4. Diaper up: Once the cream is evenly applied, put on a fresh diaper and secure it comfortably.
The appropriate time to apply diaper cream is when your baby has diaper rash or redness. This could be caused by prolonged exposure to wetness, friction from diapers, or sensitivity to certain products. Applying diaper cream during each diaper change can help prevent further irritation and promote healing.
When selecting diaper rash creams, opt for those that are gentle on the skin. Look for creams that contain natural ingredients such as zinc oxide, aloe vera, or shea butter. Recommended brands include Desitin, Burt's Bees, Aquaphor, and Mustela.
In conclusion, applying diaper cream is an important step in your baby's diaper-changing routine to prevent and treat diaper rash. By following the steps mentioned and choosing gentle creams, you can keep your little one's bottom healthy and comfortable.
 Author: Dave Smiley